Sonic Design / Assignment 3: Audio Storytelling
Assignment 03 Jump Link Outline
- Task
- Story Line (Slide)
- Audio Sources
- Process
- Outcome (No Sound Effect)
- Video Editing
- Final Outcome
- Reflection
Task
- Week 8 – Week 10
Making a Fairy-Tale Audiobook for Radio: Blog Summary
For this project, you’ll choose a fairy-tale and turn it into an audiobook, complete with voice acting, sound effects, and background sounds. Here’s what to do:
Pick a Fairy-Tale
Choose a story you love and think listeners will enjoy.Plan Your Story
Think about how to tell the story clearly and make it exciting for the audience.Record Your Voice
Act out the characters’ voices and narrate the story with emotion to bring it to life.Add Background Sounds
Include sounds that match the story’s setting, like forest noises or castle echoes.Use Sound Effects
Add effects for key moments, like doors creaking or magic spells, to make the story more fun.Edit Everything Together
Use audio software to mix the voices, sounds, and effects into one smooth recording.Review and Finalize
Listen to your audiobook and make sure it sounds great before sharing it.
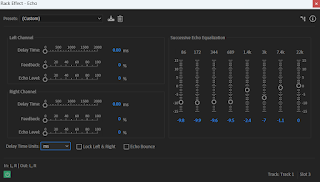
Figure 2.7: Reverb Effect (After Adjustment)
After reducing unwanted sounds and eliminating most of the background noise, I started exploring ways to remove the echoes. I tried using the reverb effect, adjusting the output levels by setting the wet level lower and the dry level higher. I found that a higher wet output level makes the audio sound like someone speaking into a microphone in an empty hall, so I opted for a higher dry rate and a lower wet rate instead.
Even though I wasn't the one recording for this assignment, I found it really fun and interesting to tell my friends how to act and play around with it. When I received the recording and listened to it, the part I liked the most was the witch segment, as it was really evil and had the effect I wanted. For the other parts, I spent a lot of time adjusting them, and I was quite satisfied with the result. However, the hardest part was the writing and recording process, especially adjusting the background voice, searching for sound effects, and finding images. Since I couldn't find the storybook online, I wrote it myself and turned it into a slide, which took a lot of time to search for image. For sound adjustments, I used the techniques that the lecturer taught us in class, though I'm not sure what happened to my effect that i applied but There were a lot of echoes in the sound, which took me a long time to fix, but finally managed to resolve it. The sound effects were also a difficult part, as I wasn't sure how to include them, but finally figured it out. Overall, this assignment was very enjoyable, and I had fun exploring the tone of storytelling. I truly enjoyed working on it.


Comments
Post a Comment